Yes, I know. I said somewhere else that the printer assembly is finished. In a way, it is, as it printed its first few parts. I don't expect to make major changes to it in the near future. However, the wiring is temporary, and I plan to clean up the cables.
There is a discussion on eMaker's forum regarding the wiring of the end stop switches. There is suspicion that the motor current flowing in the motor wires induces voltage peaks in the end stop loops, and triggers premature stops on the X or Y movements.
While I can't rule that this outright, my feeling is that the low impedance of the stop circuits (a short to ground) makes this extremely unlikely. I have stuck an oscilloscope probe to the end stop signal, and while my digital storage scope shows almost 100mV of noise, my more trusted analog scope doesn't show more than a few mV. This issue needs a more thorough investigation, which I'll conduct when I have a bit more time available.
For now, I just want to show how I decided to orient the axis on my printer, how I've placed the end stops and routed the wiring loom to have as little loose wiring as possible.
After assembling hundreds of machines in the field, I've come to learn that having a wiring loom as compact as possible, and keeping the mechanical parts as easy to disassemble as possible, are some of the points that lessen the headaches when adjusting or modifying the machine.
Two of the sections of the wiring loom are "mobile", the part that connects to the head, and the part that connects the heating bed. Both have a connector on the "mobile" end, I would have preferred if it was the other way around: the loom is solid and does not move, and when a problem happens with the "mobile" part, replacing it does not involve doing anything to the loom, it involves the section between the connector and the end part (head or bed).
So, the pictures:
Above is the view from what I call "the front". I defined it so because it is unencumbered, there is unrestricted access to the build plate, the motors are out of the way, except for the extruder gears facing us.
Above is a view from what I call "the back".
Wiring loom to the heater bed. This is the part that "flexes". It is held on the mdf bracket on the bed side, and on the bottom of the frame (to the right of the Z smooth rod).
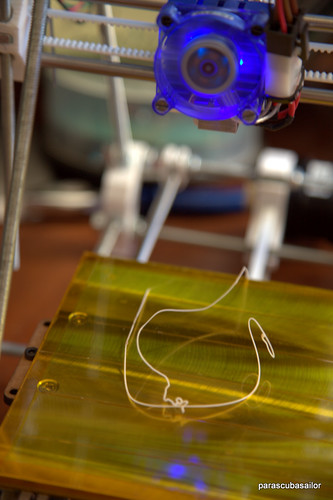
The wiring of the hot end (seen from the bottom). Note the short wires between the heating resistor and the thermistor, and the connector. The connector is held on the fan by a cable tie. This way, there is no movement of the heating resistor or thermistor wires.
Another view of the hot end seen from the front.
You can go to Picasa to see the complete album of photos relating to this RepRap build:
Oh, I forgot to mention, my choice of swapping the orientation of the X motor position (from left to right, so it would sit one the "electronics side"), means it needs to rotate the other way, compared to the other motors, so I just reversed each wire pair. Another "quirk" is that the Pronterface interface is also the other way around: left means right, and front means back, but that's not a major issue. Center is still center, and Home positions are correct in respect to the end stops. The parts that have an orientation (a left-hand/right-hand difference, parts that are not perfectly symmetrical) get printed correctly, which is the major issue IMHO.
Enjoy!


 The wind has turned Southerly. That might not be relevant for most RepRapers out there, but it is for paragliding pilots. When there's no paragliding, other activities come to the fore!
After much software fiddling, in particular installing the package several times on Ubuntu to get the optional buttons to appear, (Note: it's important to check in which directory the program gets started, as it creates a .pronsolerc in the Home directory, which, if you forget to delete it, makes the buttons not appear), I managed to get the software to run, and activate all the functions on the printer.
At first, a few of the motors wouldn't move. I double-checked the current limit values (400mV on all drivers, and I set the Z to 800mV, as there are two motors). Nothing amiss there. I powered off, moved them by hand to check that there was no mechanical snag, nothing wrong there either.
After powering on again, everything went fine! This type of troubleshooting is very unsettling to me. How am I going to fix it next time if I don't know what I did to fix it this time?
I measured the temperature wherever I could stick the thermocouple probe and compared the readings from my hand-held meter with the values displayed on the computer screen. Not bad. There are at most a few degrees deviation, and that can easily be explained by the difficulty in holding the mobile probe on the right spot, the poor thermal contact, and the cooling effect the probe has on the small part (on the hot end in particular).
The pyrometer gave me a reading of the bed surface that was in agreement with the hand-held thermocouple, and a few degrees lower than the computer reading. That also ties in.
Next, I measured the feeding of the filament. For a 10mm Extrude command, 11.5mm of filament is pushed in. I had reservations about the strength of the extruder motor, but after the little testing I have done, I fully trust that the hobbled shaft is able to push the filament (and pull it from the spool) without problem.
Next step is the calibration, and setting the parameters to have as good a print finish as possible...
Oh, and the printer got a name: Bertie. It's going to free me from having to purchase plastic parts that don't serve my purpose 100%, it's Huxley-Bertie.
The wind has turned Southerly. That might not be relevant for most RepRapers out there, but it is for paragliding pilots. When there's no paragliding, other activities come to the fore!
After much software fiddling, in particular installing the package several times on Ubuntu to get the optional buttons to appear, (Note: it's important to check in which directory the program gets started, as it creates a .pronsolerc in the Home directory, which, if you forget to delete it, makes the buttons not appear), I managed to get the software to run, and activate all the functions on the printer.
At first, a few of the motors wouldn't move. I double-checked the current limit values (400mV on all drivers, and I set the Z to 800mV, as there are two motors). Nothing amiss there. I powered off, moved them by hand to check that there was no mechanical snag, nothing wrong there either.
After powering on again, everything went fine! This type of troubleshooting is very unsettling to me. How am I going to fix it next time if I don't know what I did to fix it this time?
I measured the temperature wherever I could stick the thermocouple probe and compared the readings from my hand-held meter with the values displayed on the computer screen. Not bad. There are at most a few degrees deviation, and that can easily be explained by the difficulty in holding the mobile probe on the right spot, the poor thermal contact, and the cooling effect the probe has on the small part (on the hot end in particular).
The pyrometer gave me a reading of the bed surface that was in agreement with the hand-held thermocouple, and a few degrees lower than the computer reading. That also ties in.
Next, I measured the feeding of the filament. For a 10mm Extrude command, 11.5mm of filament is pushed in. I had reservations about the strength of the extruder motor, but after the little testing I have done, I fully trust that the hobbled shaft is able to push the filament (and pull it from the spool) without problem.
Next step is the calibration, and setting the parameters to have as good a print finish as possible...
Oh, and the printer got a name: Bertie. It's going to free me from having to purchase plastic parts that don't serve my purpose 100%, it's Huxley-Bertie.